Designing Your SolarNets
Last updated at
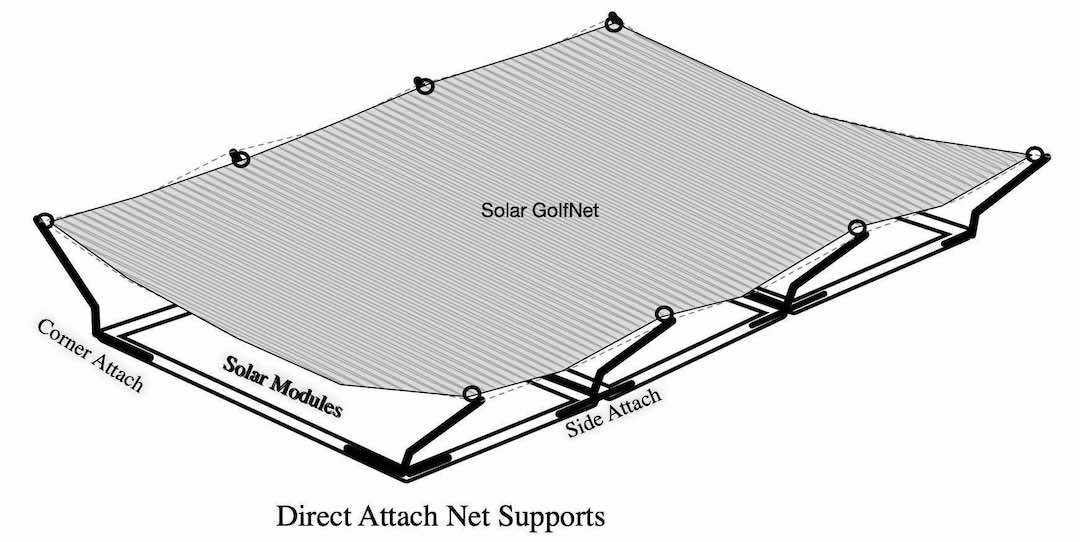
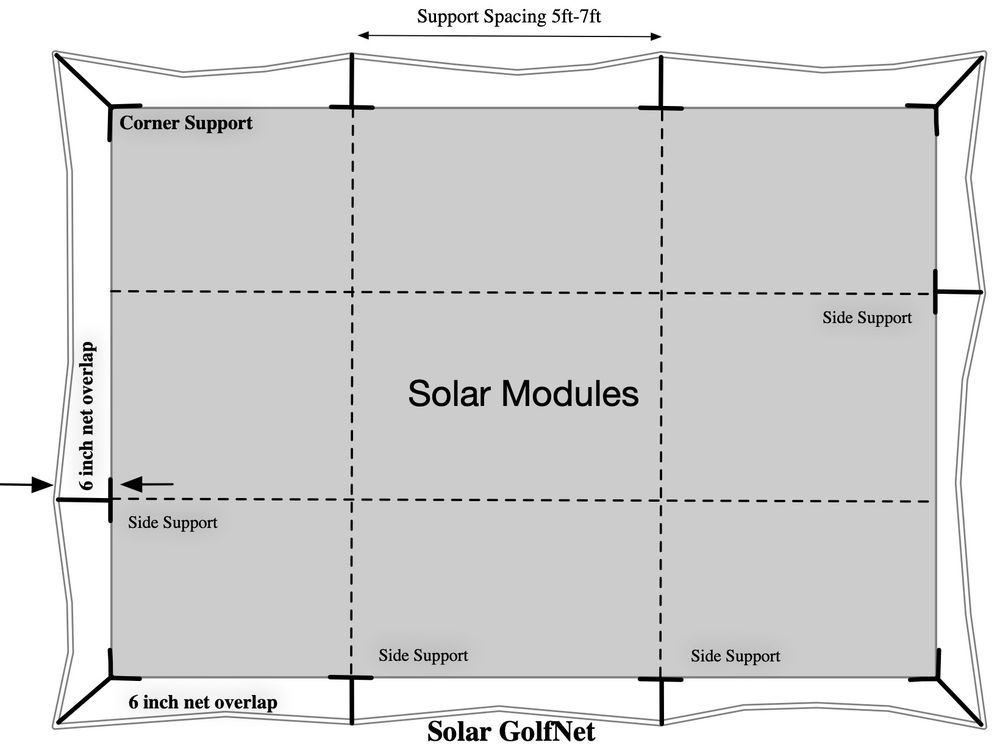
The first steps in your SolarNets process is designing a net & support layout for your solar array. The SolarNets typically is 12 inches larger than the solar array in order to minimize unprotected areas. Note, net tension will inevitably lead to curving of the net between net supports; this cannot be entirely prevented, but placing supports a closer intervals can help.
The best source of the array details are the original permit documents. You should also verify that the solar panels were in-fact placed according to the permit diagrams.
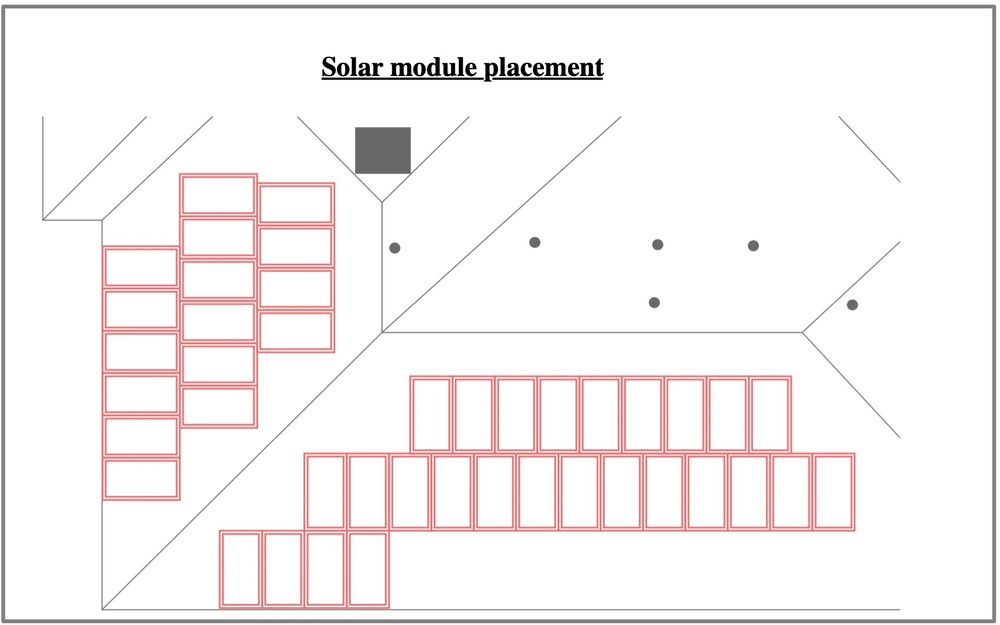
Then you can decide the best net shapes and quantity using the available shapes on the www.solarnets.com website.
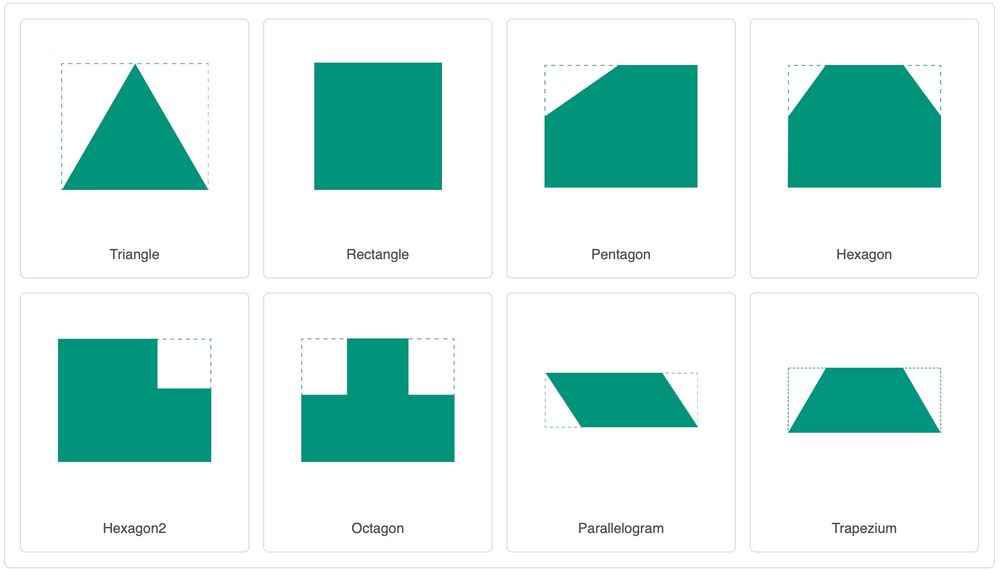
A variety of different layouts can be created. The key is to minimize the net size, while ensuring coverage of all solar module surfaces. At times it is very tough to create angled nets that cover stair-stepping array layouts. It is common the have small nets link to larger nets. Carabiner spring clips are used to stitch the nets together.
Net size calculation: (module side length x quantity) + 12 inches. Convert the value from inches to feet by dividing by 12. Round the final value to the next foot value. Repeat this process for both sides of the net.
Example: a net to cover 9 module wide, where each module is 41 inches wide:
41 x 9 = 369 inches add 12 inches: 369 + 12 = 381 inches
divide 381 by 12 = 31.7 feet. Round up to the next foot, result: 32 feet 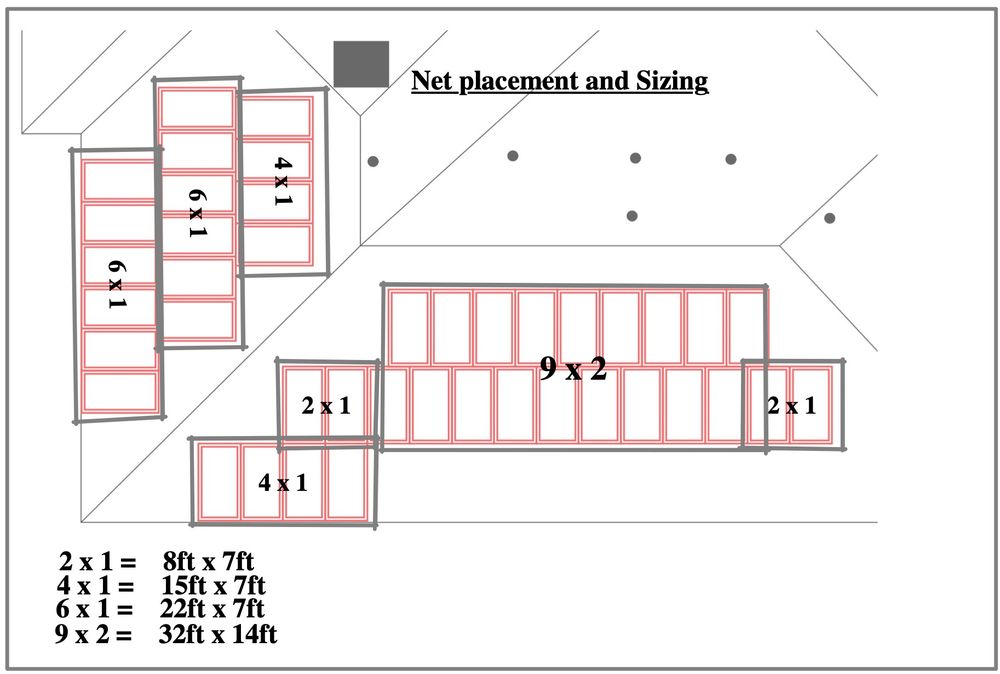
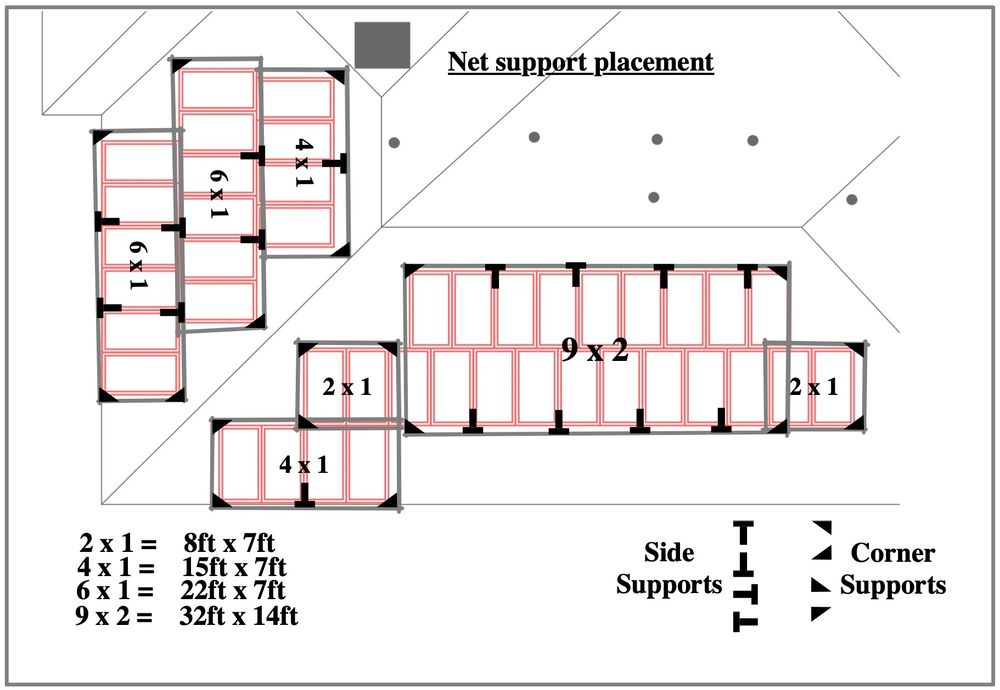
Once all the nets are defined and overlaid on the module layout, corner and side brackets can be placed.
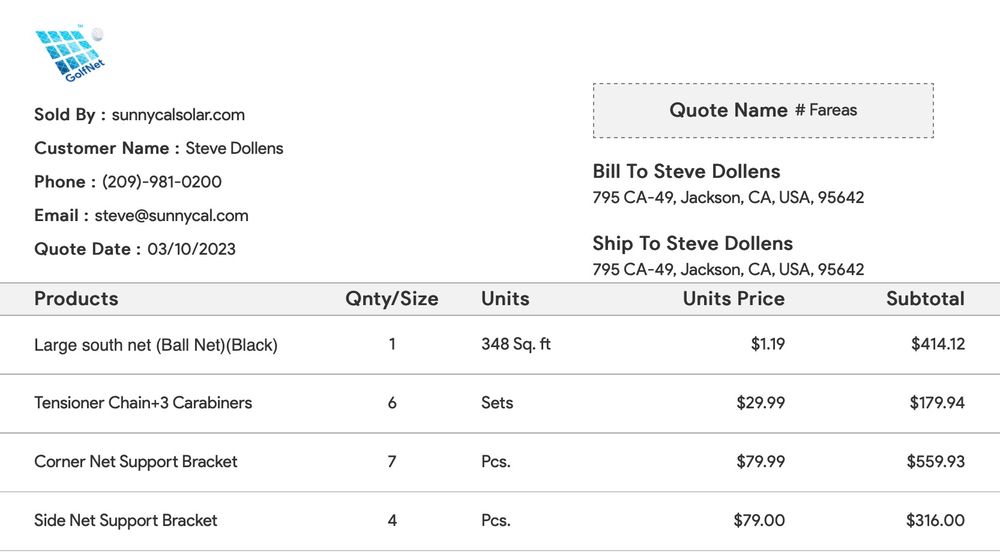
Now you are ready to use the www.solarnets.com site to enter your net and support details, including:
Ballnet or SolarNets Module thickness Net Color
Net Dimensions Support brackets Tensioners +clips
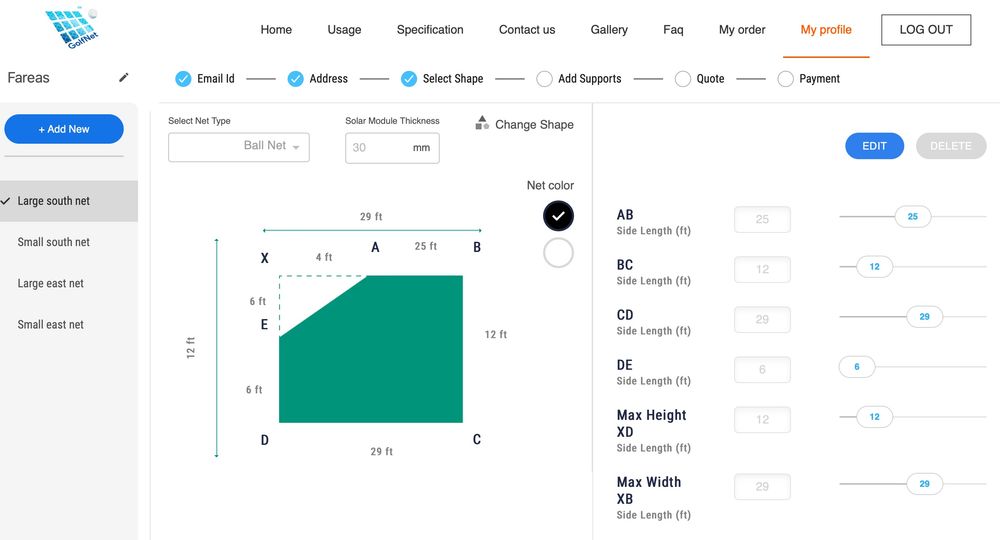
Once all your net and delivery address details are entered, the site will create an exact quote for your order.